 It's
It'sGet R Done Friday!!
The day we get to show what projects
we have started and finished,
whether they be old or new.
Go on over to Monica's and
see her great project.
Then check out the other bloggers
who are joining in our first official meme.
I'm also posting this
for Show and Tell Friday at Kelli's House too.
And for Finished for Friday at Lit and Laundry

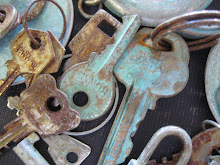
Remember these?

They became this,
and this.
 These are what i am calling my 'candle lamps'.
This is how it started:
I keep finding little lamp shades at great prices.
I thought they would be so cute on little lamps,
but i did not have any.
Sooo, I decided to make my own look alike lamps.
You will need:
candlesticks of your choice
spray paint
antiquing paint and brush
small shade
spray sealer
maybe: small candle holder or jar
opt. assorted trims
 First spray paint your candlestick the desired base color.
These were both done with white.
(I also did a couple in black)
After dry, spray with matt sealer.

 Using a black or dark brown acrylic
paint (thinned down slightly,
dob paint into all cracks and crevices.
Do small sections at a time.
Wipe off excess with rag till the desired effect.
When done, let dry, and spray sealer again.
 There are dif kinds of lamp shades to look for.
Some just have a circle rim inside (left)
and some have those little 2 or 4 prongs that go
down over the light bulb.
Either can be used, but they are done differently.
Ring can just sit on top of holder,
prongs must be in or around something.
 A little votive candle cup works great for both.
You can put the prongs down into it,
or set the ring on it.
It is important that most of the beauty
of the candlestick be exposed.
That is what the jar or votive cup are also for.
You will need to find the right size to do that.
You might also think about turning it upside down
so the more decorative side is showing on the bottom.
The candle cup and candle holder can be glued with hot glue.
Then the shade can either just sit on top,
or be glued on.
(sometimes the shade will just sit on top of the
candle holder without anything on it)
You just have to play.
For glass:
Old globes from other fixtures can just be used for the 'shade'.
Glue a votive holder on top of the candle stick,
Then add shade to top.
I am actually burning a candle in this one!!
 (sorry, I know this is hard to see.
I hope this project does not scare you off.
It is really quite fun, and usually faster to do than to tell you. =0))
-----------------------------------------
NEXT WEEKS PROJECT
 Add a shelf on top?
 Add pegs?
Help me decide what to do with this cute old foot board.
Blessings,
Barbara Jean


11 comments:
I really like your lamps. You did a great job. May God bless your week.
Nice post! Your name is entered twice - the first link you had went to your yesterdays' posting, not the project posting! Fixed it for you! I can't wait to see what you will come up with for the footboard! It is cute - would look neat with pegs, and what an idea! I'd never have thought of it! Have a good weekend!
How amazing that you saw the potential in all those items. The lamps are very pretty.
Mama Bear
Hi!
Beautiful lamps! I like them all! As for your foot board, how about putting pegs in it for a coat rack. Have a great day!!
Sherrie
http://mygardeningwoes.blogspot.com/2009/06/show-and-tell-friday_19.html
Thanks for stopping by my blog, but OH NO, another great crafter you are! I don't know if I belong here on Get R Done Friday's or not.
Your little lamps are so cute and how wonderful that you put them all together! And for my 2 cents...I would make a shelf from the footboard, but I am sure whatever you choose will be cute.
Great lamps! And thank you for including the instructions, I've bookmarked it.
Thank you for joining in on Finished for Friday - hope to see you back many many times!
Your lamps are charming designs...thanks for the tutorial!
Love those lamps. Can't wait to see your reworked foot board.
Great job! You completed your projects perfectly :) So cute!
All the best,
Allison
Wow! Great job on the lamps!
Post a Comment